Below is a step by step tutorial on how to make this beer cap tray. This would probably work with a coffee table as well.
- Step 1: Start drinking :) Try to take the caps off so there is not to much damage.
- Step 2: Start with a naked wood tray. They sell these at Michaels (very cheap).
- Step 3: Paint or stain the tray. I used a maroon paint on the bottom and a dark stain for everything else. I had this left over from other projects, but this is where you can really customize your tray. So have fun with your colors!
- Step 4: Once the paint is dry you can use a gloss/varnish to make it look nice and polished. Not the best picture below but it should give you an idea of the process.

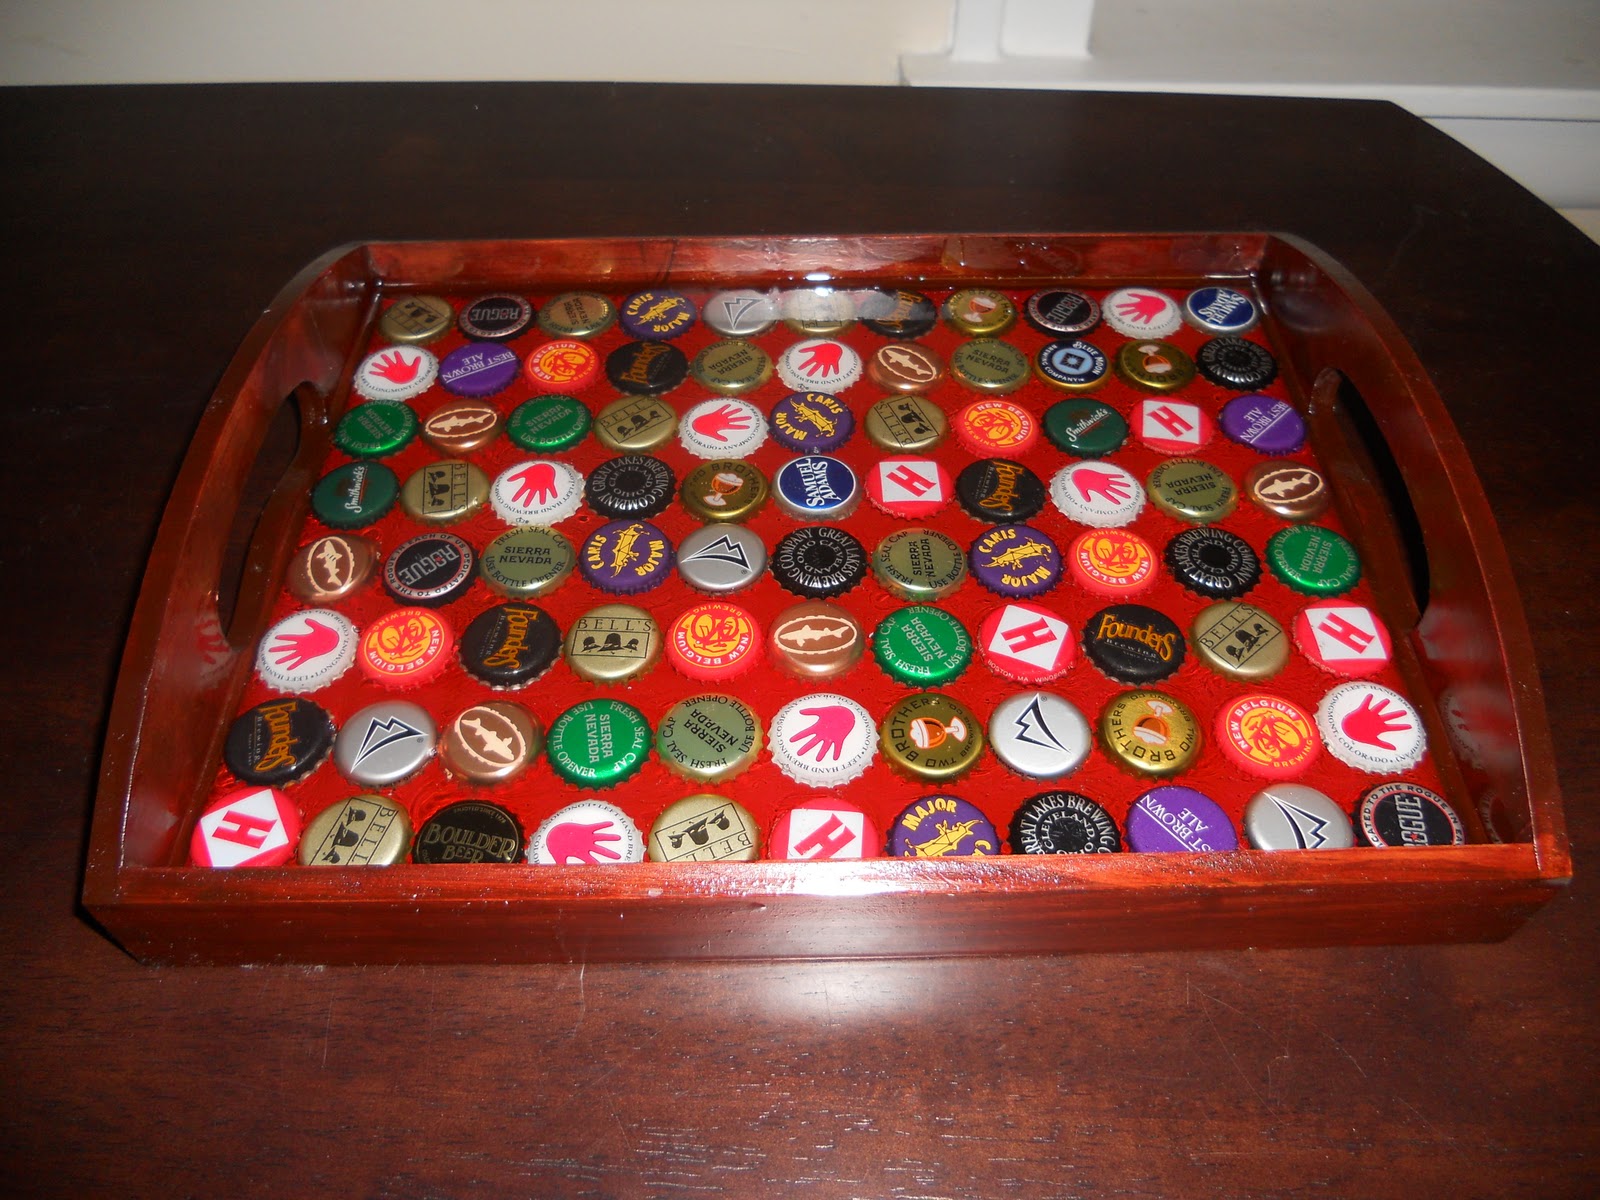
- Step 5: Once it is totally dry (probably a day or two) you can start gluing the caps down. I suggest laying out out how you want it to look first. I chose to keep mine all different but you can easily make a pattern of a letter with the right color caps. I used a wood glue (pictured below) from Michaels.

- Step 6: Time to pour on what I call liquid glass. It is actually a 2 Part Epoxy Resin (picture below), from Michaels. When it dries it looks just like glass! Follow the instructions on the box for mixing and application. When pouring make sure not to pour too much at once. Make sure it covers all the caps with a little extra on top. Also, to be safe I put painters tape over the holes on the side (this will keep excess from spilling over). Keep the tape on until it is totally dry. You may also get a few air bubbles. Just put a flame from a lighter over them and the heat will make them go away. The bubbles will happen in the first 20-30 minutes.

- Step 7: Wait for the liquid glass to dry. This is the tough part because it requires patience! It will take about 2 days. I suggest covering the tray with a box while it is drying so that debris does not get into the mix.
- Step 8: ENJOY! You are sure to get lots of compliments :)

No comments:
Post a Comment